GOOGLE CLOUD / BEFORE YOU CONNECT
Prepare the cloud.
Then let WordPress take over.
For automatic setup, prepare an account, a project, and billing. The plugin handles the bucket connection; you do not need to build your own OAuth application.
01 / PROJECT & BILLING
Choose a project you control.
Open the Google Cloud project creation page, or use an existing project. Give it a recognizable name, select the appropriate organization or parent if your account uses one, and select the billing account you are authorized to use.
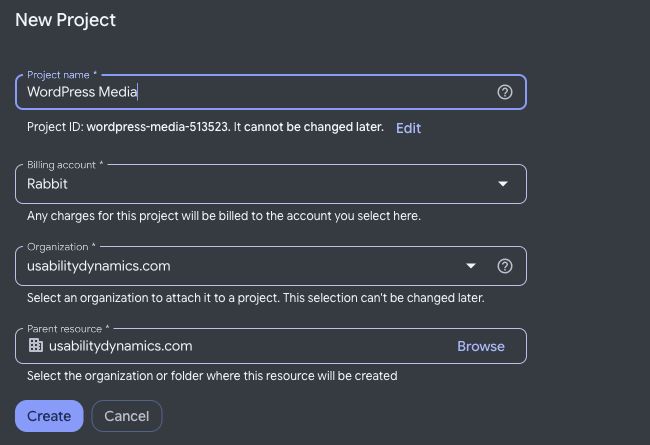
For an existing project, open Billing in the Cloud console and check that it is linked to an active billing account. A Google account alone does not enable billable storage.
02 / PERMISSIONS
Use an account that can finish setup.
The account needs permission to list or select the project, enable required APIs, create or access a bucket, create a service account and key, and configure bucket access. An organization may restrict service-account keys or public media even when you can view the project.
If setup reports a policy or permission error, ask your Google Cloud administrator to review it. Do not remove organization protections simply to make a demo pass. Manual setup is available when your team manages credentials itself.
03 / VERIFY YOUR BUCKET
Find the files after setup.
Choose the same project in Google Cloud, then open Cloud Storage → Buckets → your bucket → Objects. The folders and object names depend on your WordPress upload settings and optional root directory.
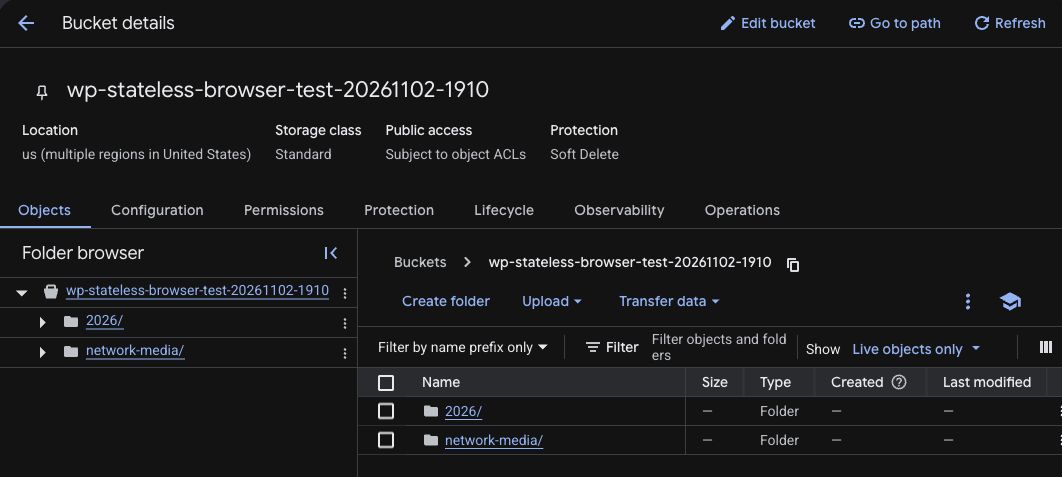
Understand public media access.
Website images need to be readable by visitors. Keep private documents and backups out of a bucket intended for public media. In a fine-grained bucket, the console can say Subject to object ACLs: inspect individual objects and test a logged-out image URL to confirm access.
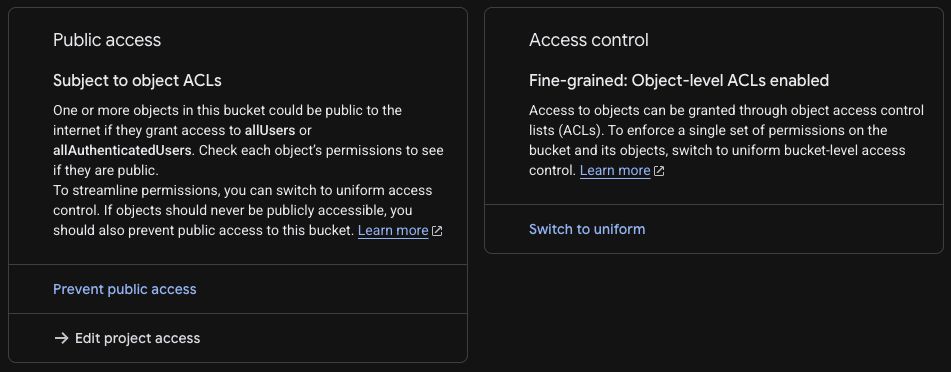
Uniform bucket-level access uses bucket IAM instead of individual object ACLs. See the manual setup guide before changing an existing bucket.
Full Cloud setup walkthroughs
1. Billing account
Set up billing and associate it with your project.
2. Cloud project
Understand project names, IDs and organization ownership.
3. Storage bucket
Choose location, storage class, access and protection.
4. Service account and key
Configure the application identity and protect its JSON key.
5. WordPress settings
Save configuration, upload media and verify the bucket.
Original setup introduction
Welcome to the WP-Stateless Setup Manual!
This guide will walk you through the process of setting up Google Cloud Platform (GCP) for use with the WP-Stateless WordPress plugin. By following the steps below, you’ll be able to offload and serve your media directly from Google Cloud Storage.
The setup process includes the following steps:
- Create a Google Cloud Billing Account
- Create a Google Cloud Project
- Create a Google Cloud Bucket
- Create a Google Cloud Service Account
- Configure WP-Stateless Settings
A Note for Experienced Users: If you are already familiar with Google Cloud Platform, please pay special attention to Step 3.2 in the bucket setup guide. These specific settings are crucial to prevent issues and ensure the WP-Stateless plugin works correctly with your bucket.