ADVANCED / MANUAL SETUP
Bring your own
cloud configuration.
Use manual setup when your team manages Google Cloud resources and credentials, or when the installed plugin version uses the legacy assistant.
1. Prepare the project and bucket.
Use a project with active billing. Create a dedicated Cloud Storage bucket for website media, choosing its location and storage class deliberately. Keep confidential content separate. See the illustrated Cloud guide.
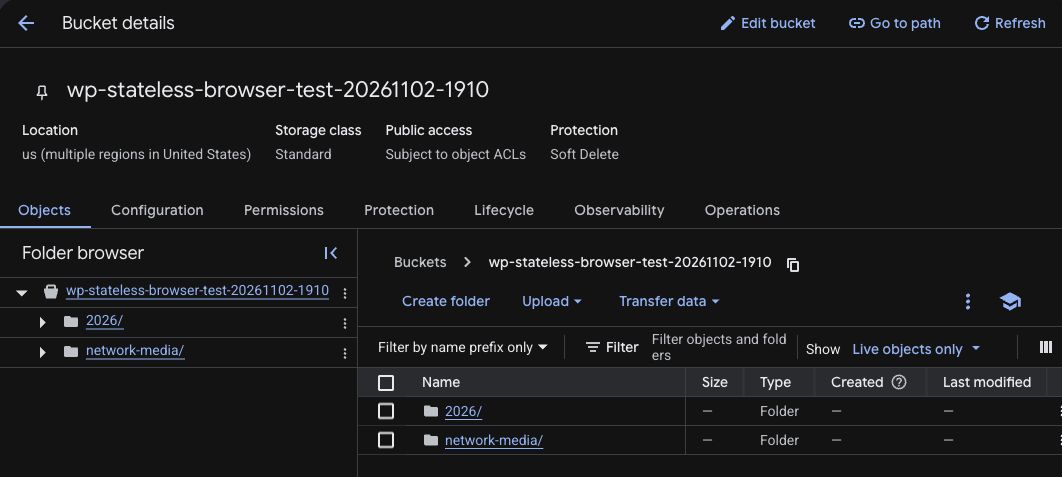
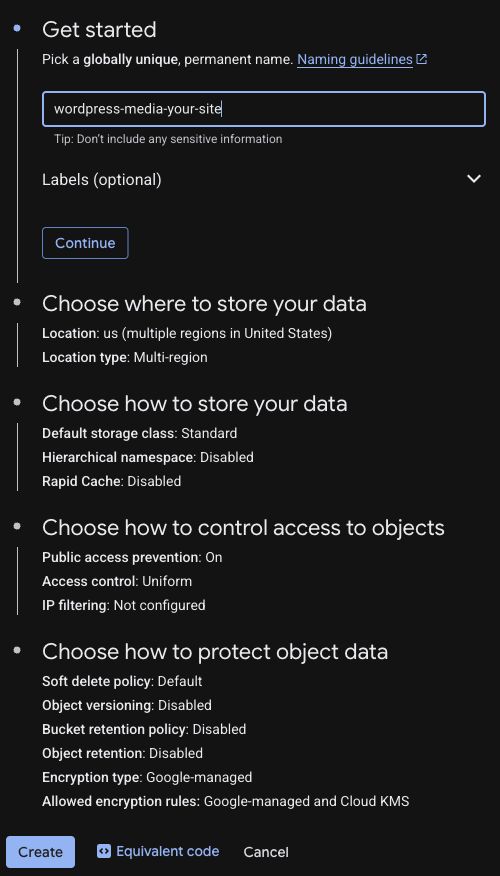
2. Configure access for the plugin.
Create a service account in the same project, or use an existing account approved by your administrator. Grant the required storage access on the selected bucket rather than unrelated resources. The legacy setup uses the Storage Admin role at bucket scope.
If your organization permits service-account keys, create a JSON key for that account and transfer it securely to the WordPress configuration. Treat the JSON as a password: do not publish it, commit it, or put it in a screenshot.
Public website media must be readable by visitors. Fine-grained buckets can use object ACLs. For uniform bucket-level access, configure bucket IAM for public media and use the plugin’s WP_STATELESS_SKIP_ACL_SET setting so it does not attempt object ACL operations. Verify support in your installed release before changing access models.
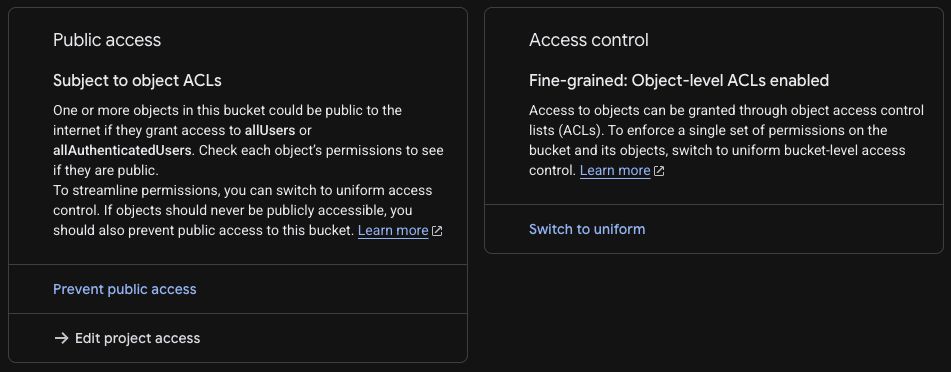
3. Configure WordPress.
Open Media → Stateless Settings. Choose the mode, enter the bucket name, and provide the service-account JSON using the settings supported by your release or protected deployment configuration. Save, then upload a small image.
Check the original, generated sizes, and logged-out page delivery. Only then run synchronization on the existing library.
References: service-account keys, public object access, and uniform bucket-level access.
Original five-step manual setup reference
The complete earlier guide remains available below. Google Console labels and trial terms have changed. The detailed tutorials linked below use the same five stages, and explain current key creation and bucket-scoped access. Do not grant a service account access to unrelated project resources.
The WP-Stateless setup assistant will walk you through the process of creating a Google Cloud project, bucket, service account, and associated billing account. If you prefer to handle these manually, simply follow these instructions.
Setup Process
- Create Google Cloud Billing Account
- Create Google Cloud Project
- Create Google Cloud Bucket
- Create Google Cloud Service Account
- Configure WP-Stateless Settings
1. Create Google Cloud Billing Account
Every Google Cloud project needs an associated billing account, and it can be helpful to have this billing account in place before creating your project. Simply visit https://console.cloud.google.com/billing/create and follow the instructions.
If you are new to Google Cloud, you will be presented with a $300 credit to spend over the next 12 months.
2. Create Google Cloud Project
With a billing account in place, visit the Google Cloud Console and create a project you want to be associated with the website you are working on.
3. Create Google Cloud Bucket
- From within your project, visit Storage > Browser and click Create Bucket.
- Go to the Permissions tab for the bucket and enable Object-level permissions.
- Make the bucket data available publicly by following these steps: Make Data Public.
4. Create Google Cloud Service Account
- From within your project, IAM & Admin > Service accounts.
- Click Create Service Account and name it wp-stateless.
- Check Furnish a new private key and select JSON as the key type.
- Return to Storage > Browser, and Go to the Permissions tab for the bucket
- Click on “Add members” and type “wp-stateless” in Input field. GCP will autocomplete this name with full IAM email. Select this email. In dropdown “Select a role”, select “Storage Admin”. Click on “Save”.
5. Configure WP-Stateless Settings
From the WP-Stateless settings panel, the basic settings you should concern yourself with to get started are: Mode, Bucket, and Service Account JSON.
- Mode - select the desired mode to enable WP-Stateless.
- Bucket - insert the name of the bucket you created in Step 3.
- Service Account JSON - open the JSON file you obtained in Step 4 and copy the contents into this textarea.
Click Save Changes and upload something via the Media Library. If you set the WP-Stateless mode to CDN or Stateless, you should see the media’s file URL referencing Google Cloud Storage (storage.googleapis.com).
Full Cloud setup walkthroughs
1. Billing account
Set up billing and associate it with your project.
2. Cloud project
Understand project names, IDs and organization ownership.
3. Storage bucket
Choose location, storage class, access and protection.
4. Service account and key
Configure the application identity and protect its JSON key.
5. WordPress settings
Save configuration, upload media and verify the bucket.